How to use Multiple Stores for Mall
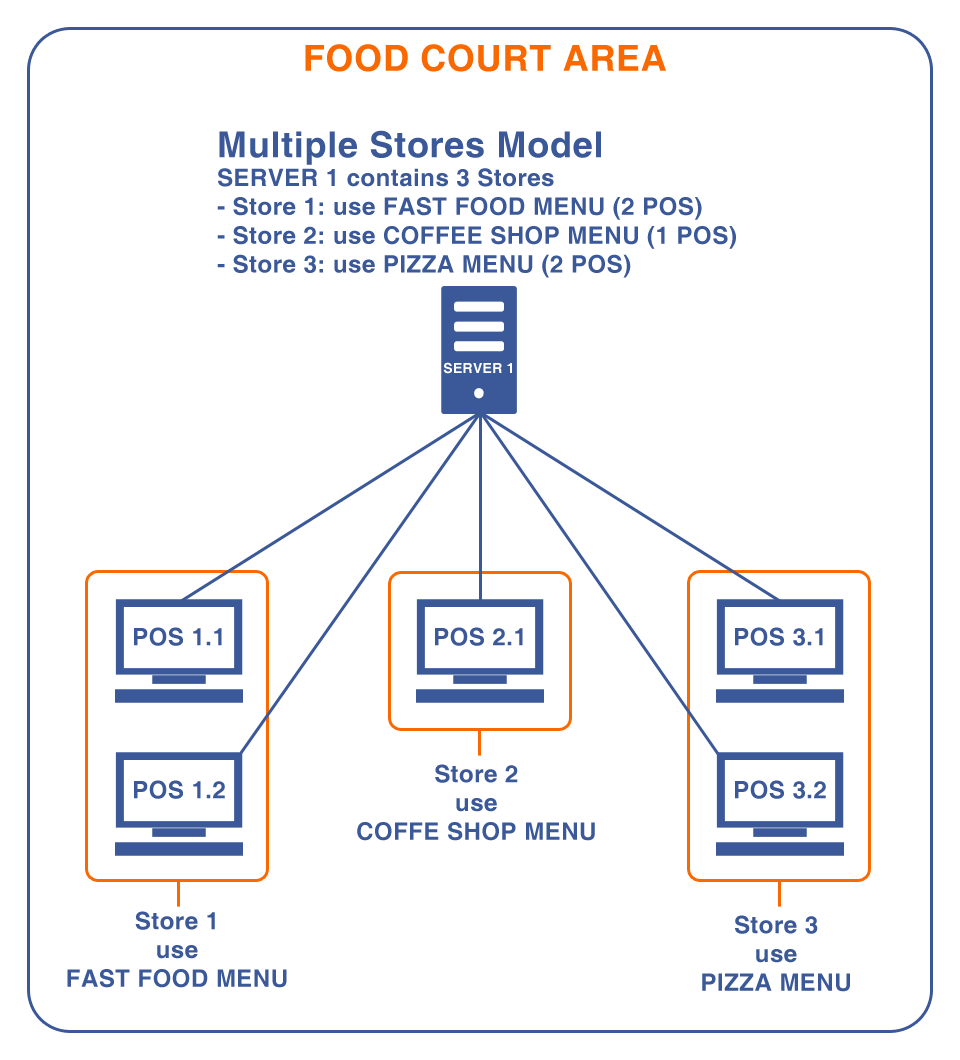
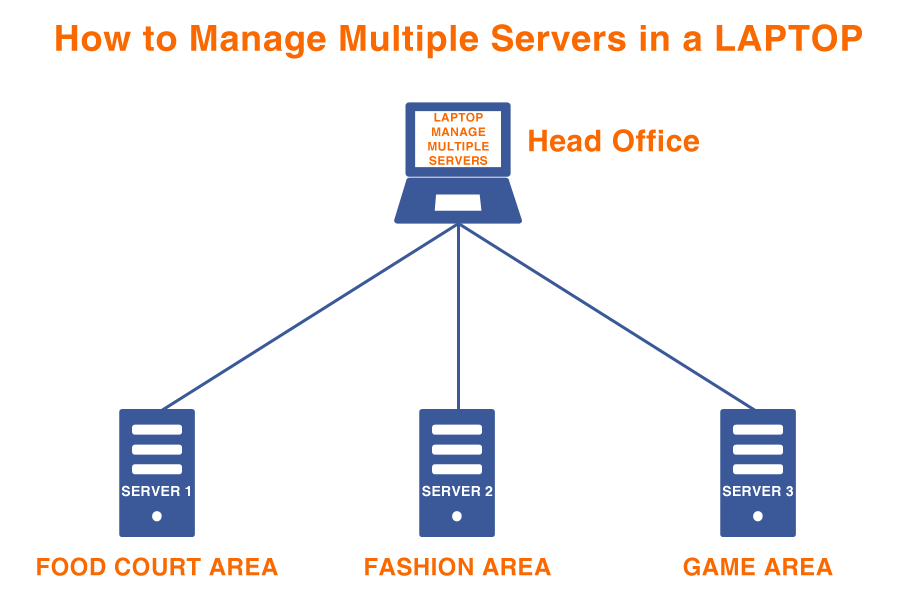
Scenario: My Mall has three areas:How to manage each area in my mall.
Step 1: Install Multiple Stations with Database Server
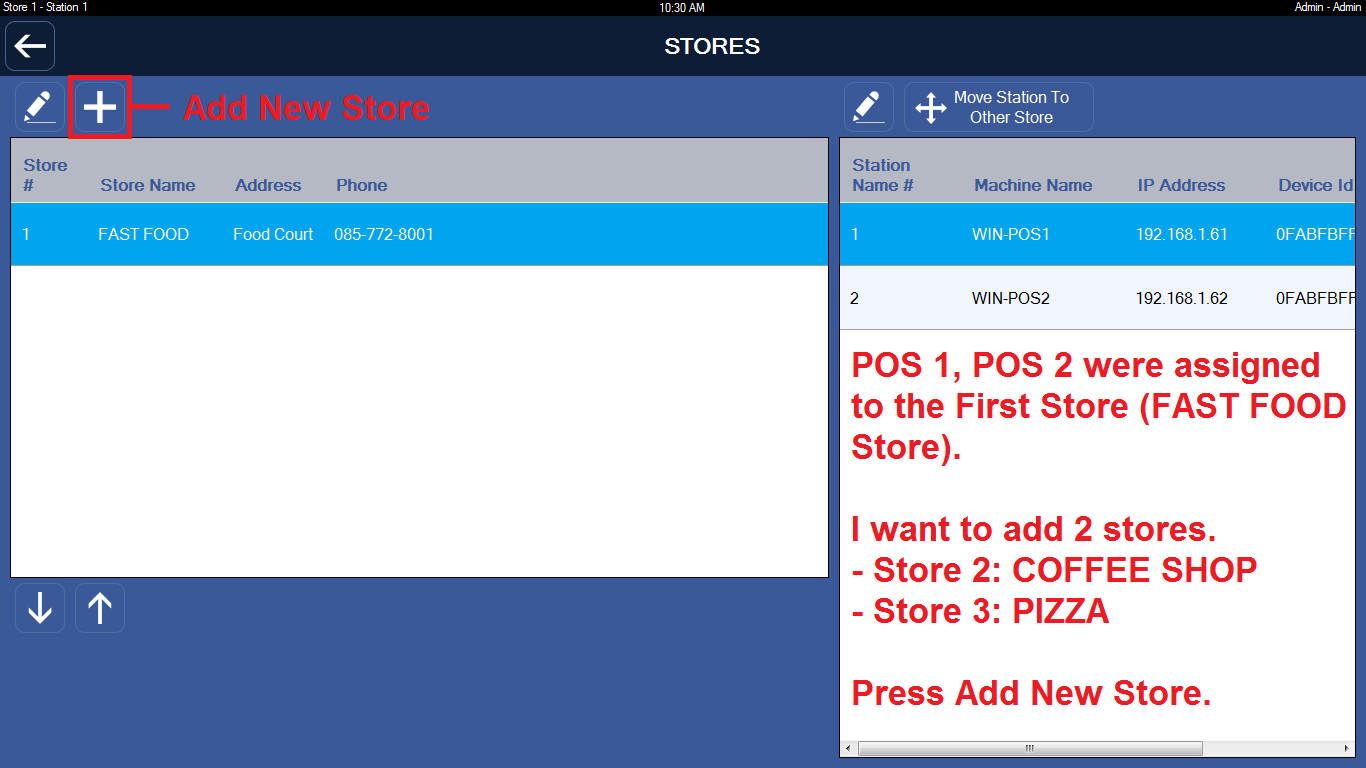
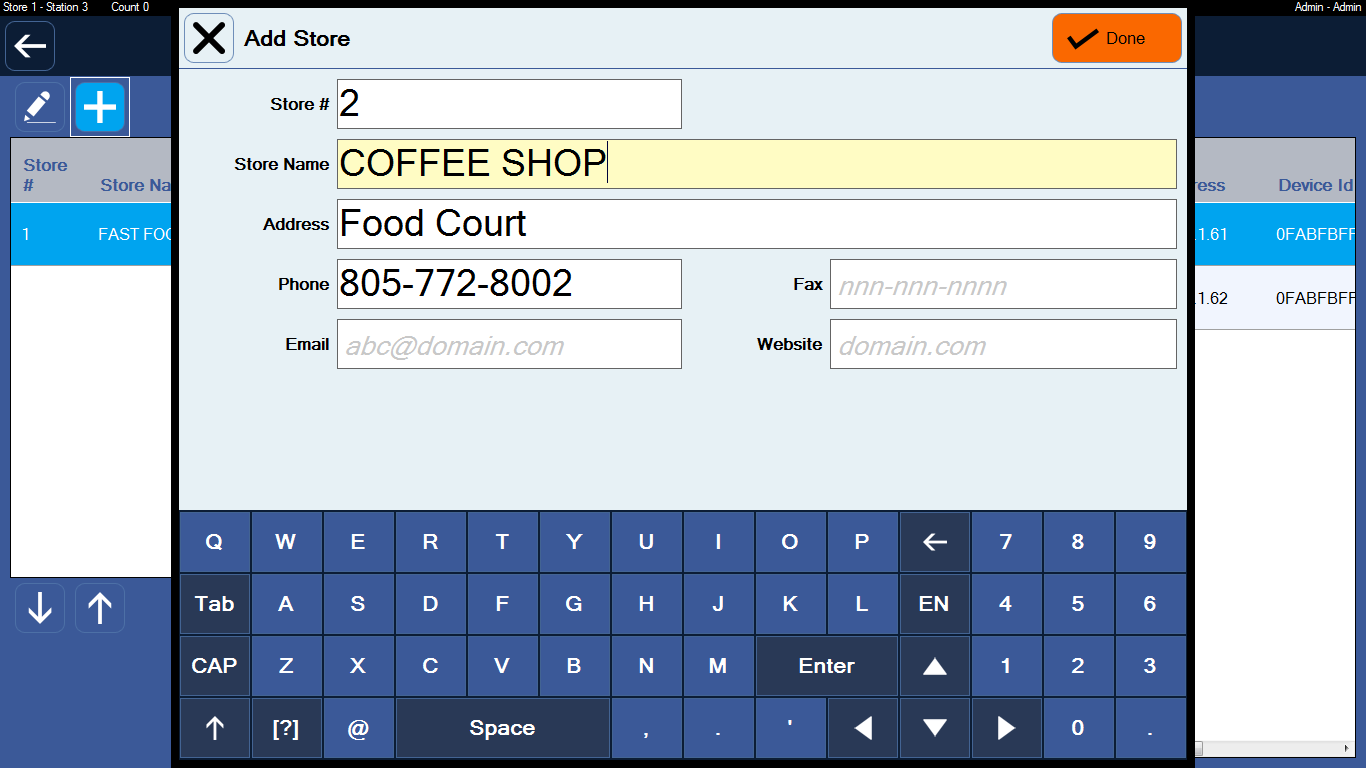
Step 2: Setup Multiple Stores on Server
Example: About Food Court Area, you have 3 restaurants: Fast Food, Coffee, Pizza restaurant. You will make the three stores on SERVER 1, and then assign a POS station to a store.
The same as Fashion Area and Game Area. Then manage the these servers at Head Office.
Step 2: Setup Multiple Stores on Server
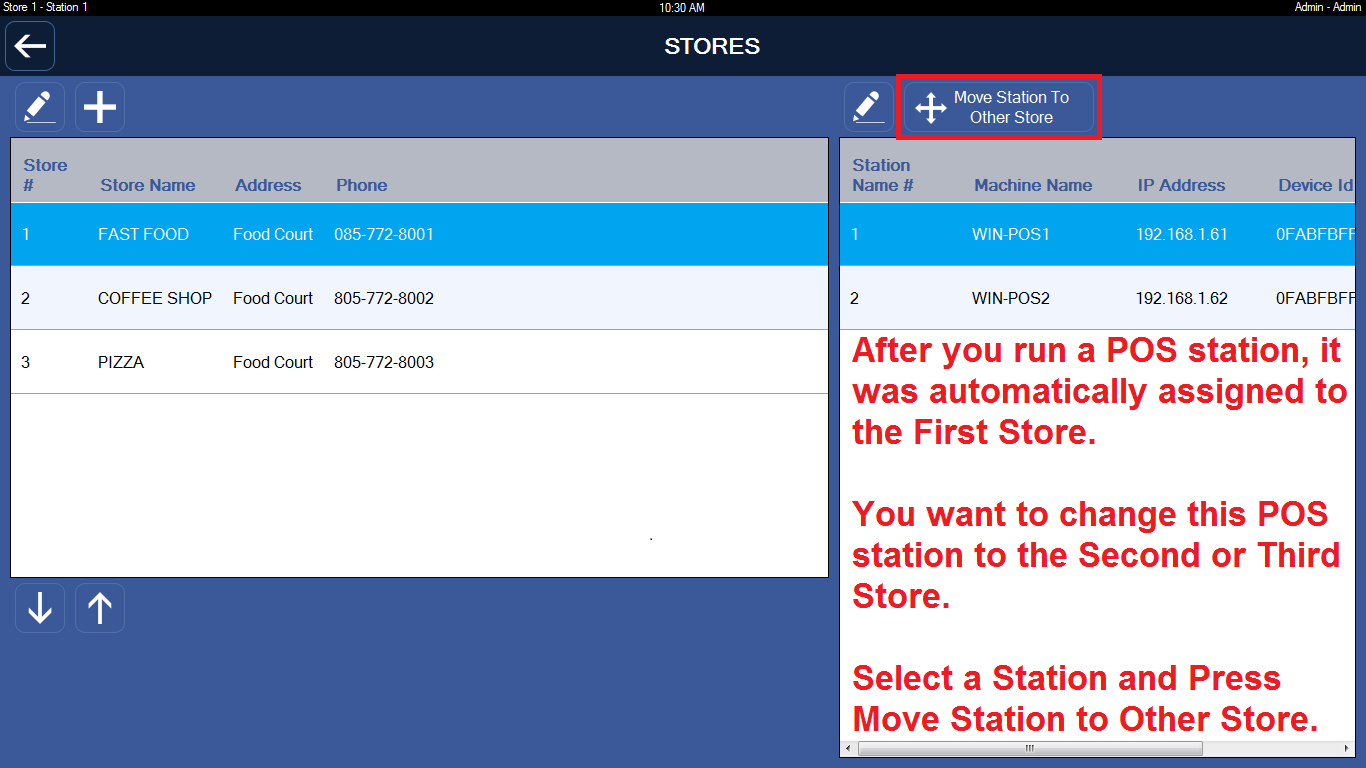
At SERVER 1. You add 3 stores. Store 1: Fast Food. Store 2: Coffee Shop. Store 3: Pizza.Home Screen => Admin => Advanced Settings => Multi Store.
Notes: After you run a POS station, it was automatically assigned to the First Store.
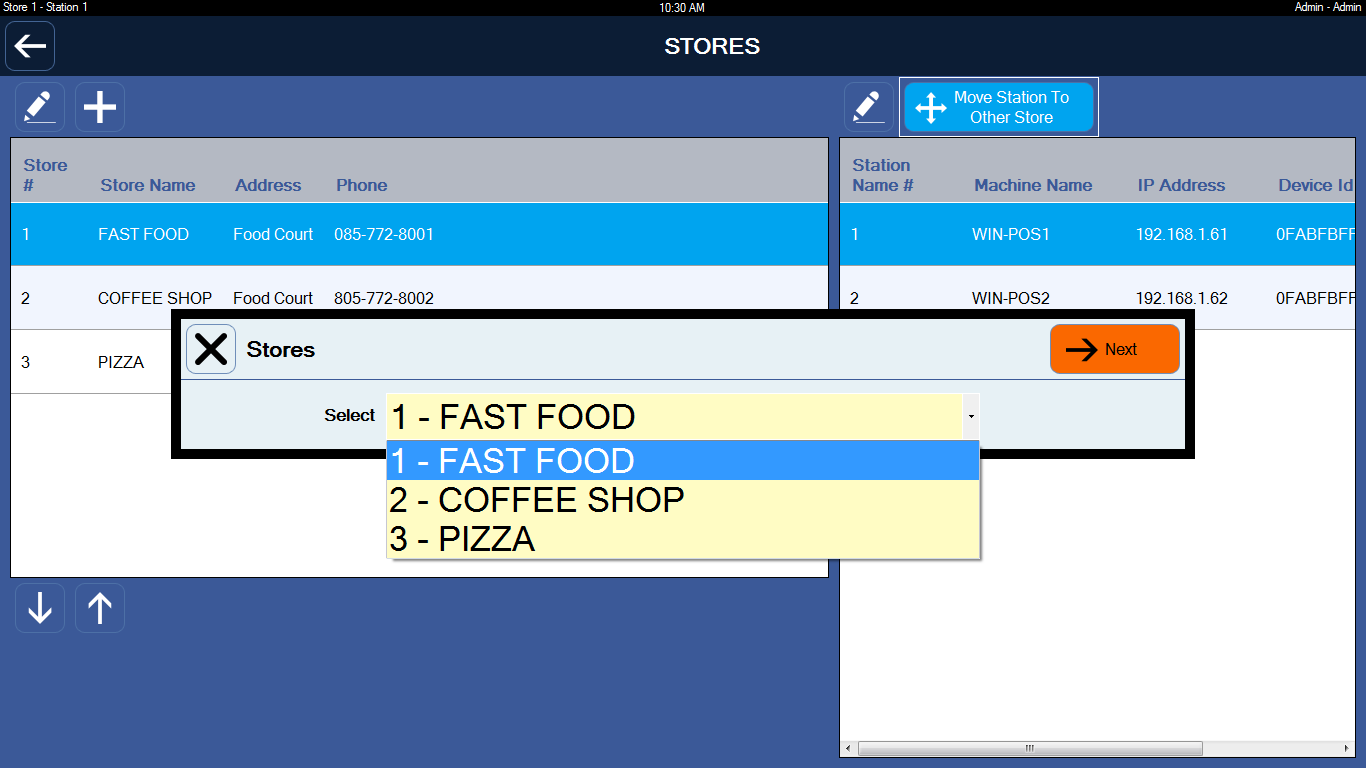
You want to change this POS station to the Second or Third Store.
Select a Station and Press Move Station to Other Store.

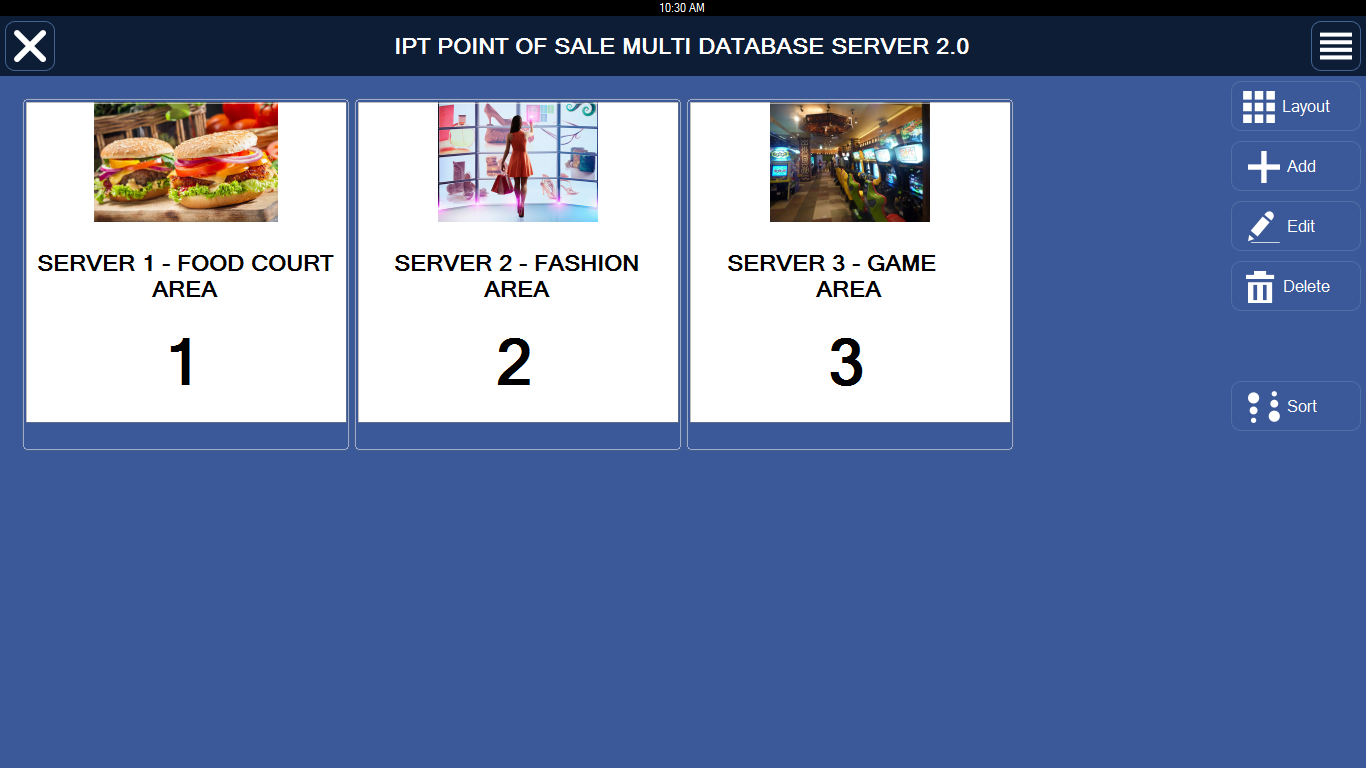
Step 3: Manage at Head Office
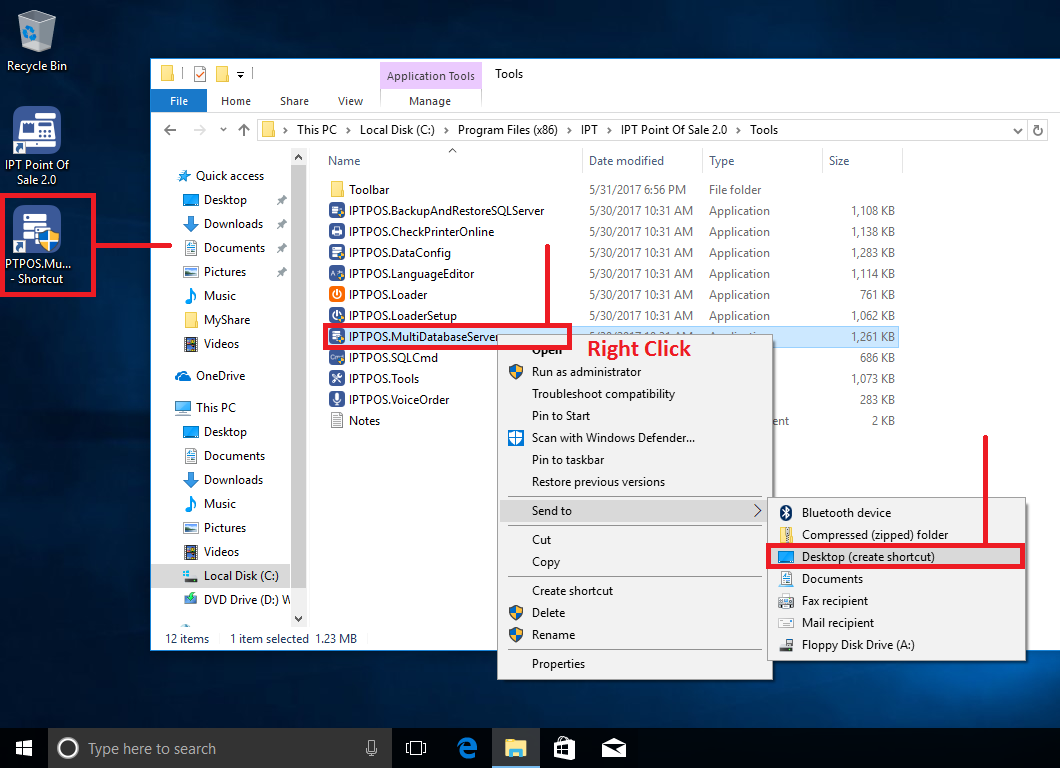
At Head Office, install STANDALONE app on LAPTOP. Then you go to the following folder:
Notes: Right Click file IPTPOS.MultiDatabaseServer.exe and Select Send to => Desktop (create shortcut). Then you can quickly run this file from Desktop screen.